举例
此处列出一些用openpyxl操作excel的实际的例子,供参考。
用openpyxl读取excel文件
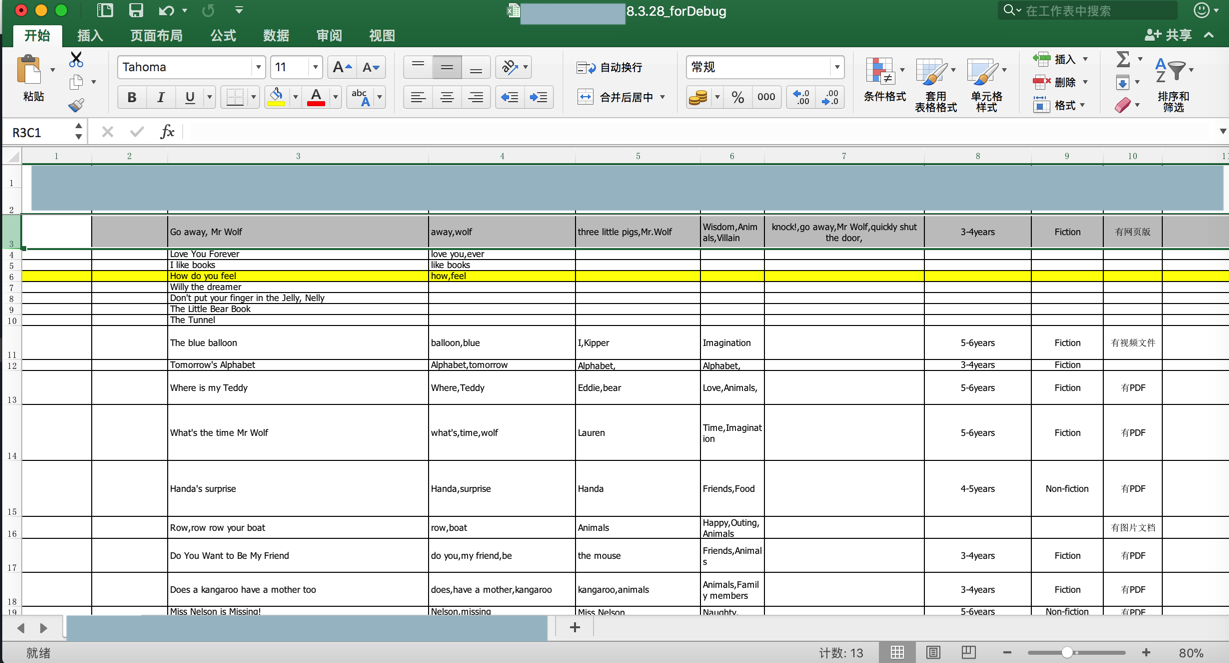
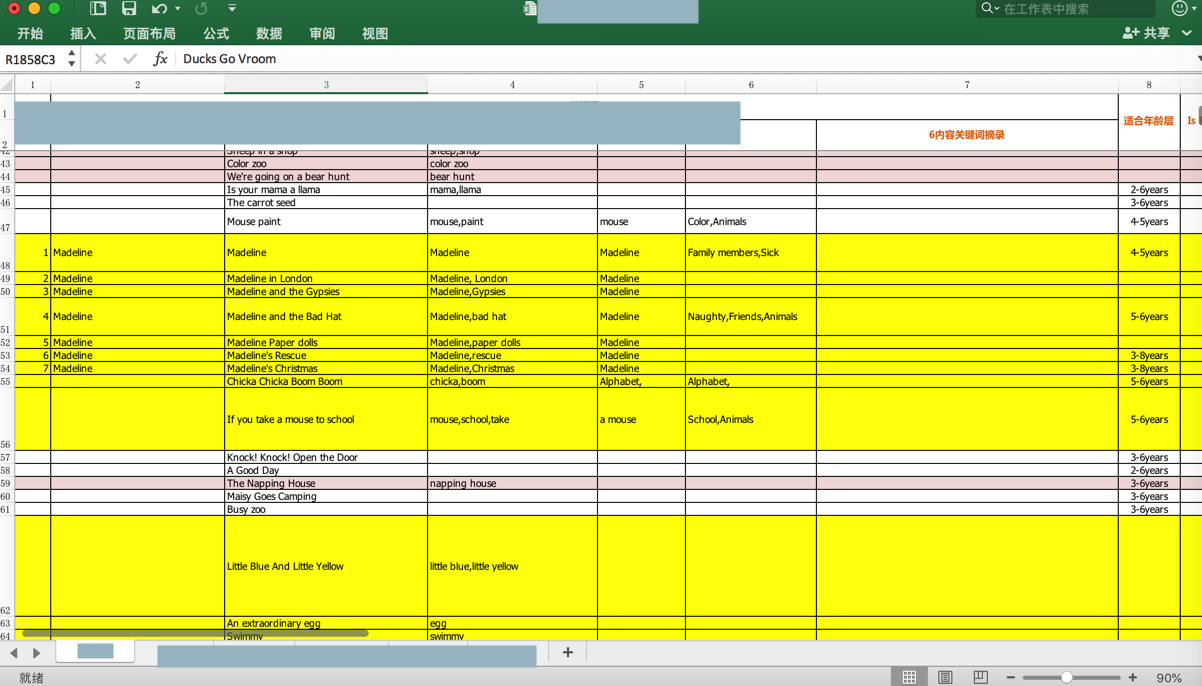
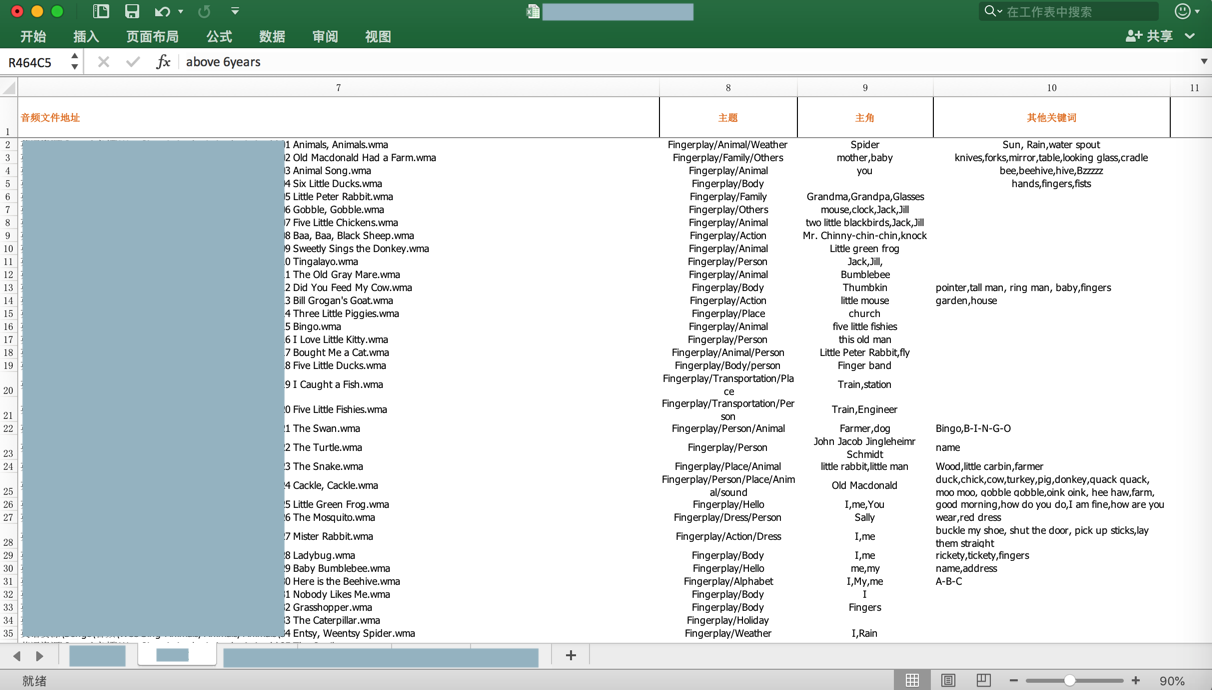
对于excel文件:
代码:
from openpyxl import Workbook, load_workbook

StorybookSheetTitle = u"绘本"
EnglishStorybookRootPath = "/Users/crifan/dev/dev_root/xxx"
ExcelFilename = "xxx资源2018.3.28_forDebug.xlsx"
ExcelFullFilename = os.path.join(EnglishStorybookRootPath, ExcelFilename)
AudioFilePathPrefix = EnglishStorybookRootPath

# parse excel file
wb = load_workbook(ExcelFullFilename) # work book
logging.info("wb=%s", wb)
# sheetNameList = wb.get_sheet_names()
# logging.info("sheetNameList=%s", sheetNameList)
ws = wb[StorybookSheetTitle] # work sheet
logging.info("ws=%s", ws)

# process each row in excel
for curRowNum in range(realContentRowStartNum, ws.max_row + 1):
    logging.info("-"*30 + " row[%d] " + "-"*30, curRowNum)

    hasAudioFileColNumCellValue = ws.cell(row=curRowNum, column=HasAudioFileColNum).value
    logging.info("col[%d] hasAudioFileColNumCellValue=%s", HasAudioFileColNum, hasAudioFileColNumCellValue)
    audioFilePathColNumCellValue = ws.cell(row=curRowNum, column=AudioFilePathColNum).value
    logging.info("col[%d] audioFilePathColNumCellValue=%s", AudioFilePathColNum, audioFilePathColNumCellValue)
输出:
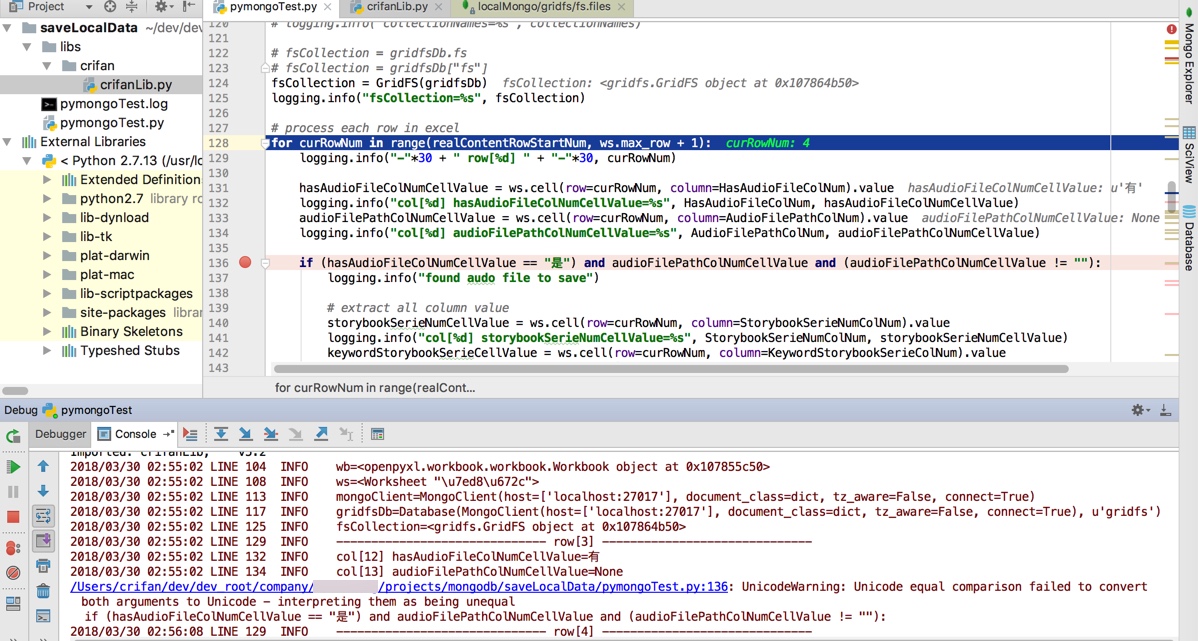
2018/03/30 02:55:02 LINE 104  INFO    wb=<openpyxl.workbook.workbook.Workbook object at 0x107855c50>
2018/03/30 02:55:02 LINE 108  INFO    ws=<Worksheet "\u7ed8\u672c">
2018/03/30 02:55:02 LINE 113  INFO    mongoClient=MongoClient(host=[‘localhost:27017’], document_class=dict, tz_aware=False, connect=True)
2018/03/30 02:55:02 LINE 117  INFO    gridfsDb=Database(MongoClient(host=[‘localhost:27017′], document_class=dict, tz_aware=False, connect=True), u’gridfs’)
2018/03/30 02:55:02 LINE 125  INFO    fsCollection=<gridfs.GridFS object at 0x107864b50>

2018/03/30 02:55:02 LINE 129  INFO    —————————— row[3] ——————————
2018/03/30 02:55:02 LINE 132  INFO    col[12] hasAudioFileColNumCellValue=有
2018/03/30 02:55:02 LINE 134  INFO    col[13] audioFilePathColNumCellValue=None
(用PyCharm)调试输出的效果:
新建excel文件并保存数据和设置单元格样式
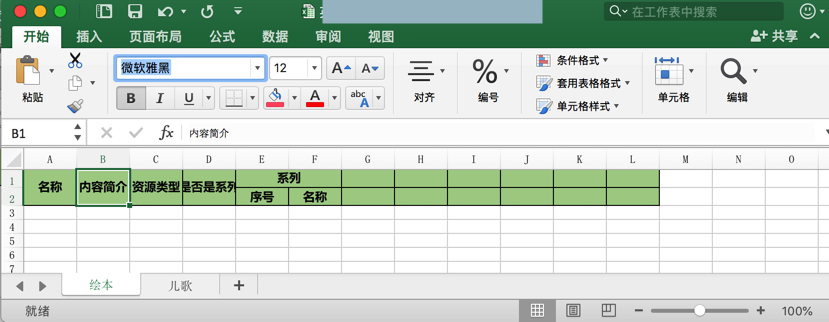
背景:希望新建这种效果的excel
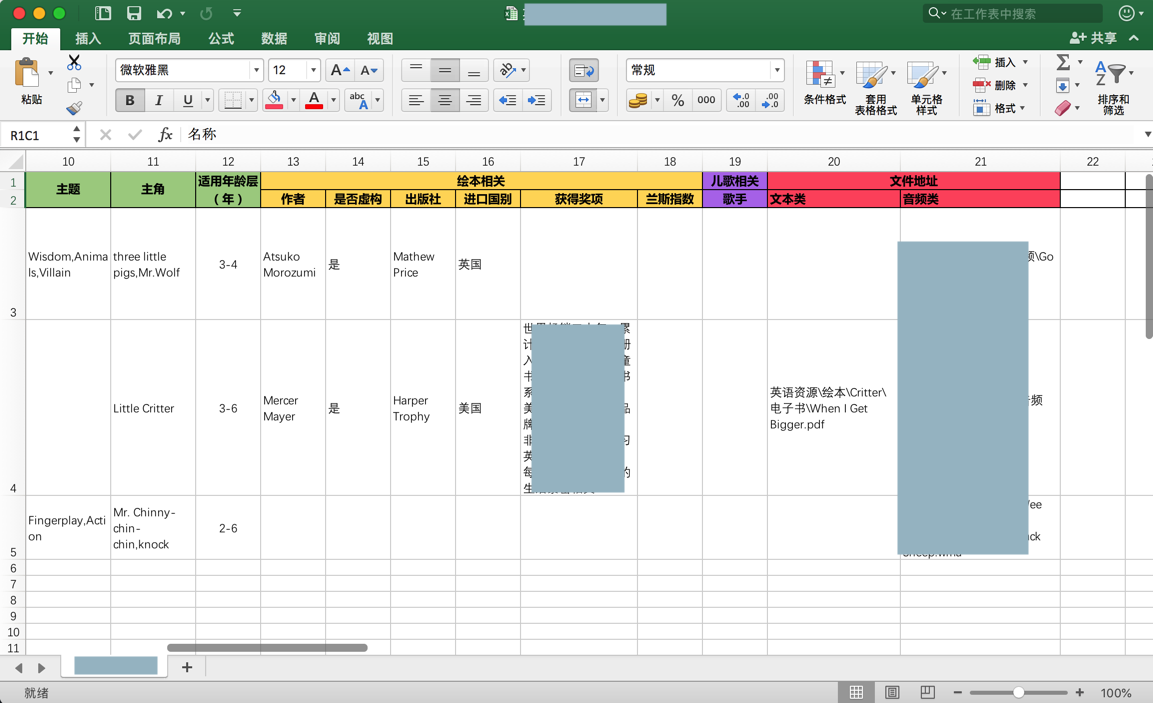
并且创建对应的第一行和第二行的表头,且部分单元格是合并的
然后再一点点把之前已有的excel中的内容:
保存进来。
代码:
from openpyxl import Workbook, load_workbook
from openpyxl.styles import Alignment
from openpyxl.styles import PatternFill, colors, Color
from openpyxl.styles import NamedStyle, Font, Border, Side

# create new output unified format excel file
wbOut = Workbook()
logging.info("wbOut=%s", wbOut)
# wsStorybook = wbOut.create_sheet(StorybookSheetTitle)
wsStorybook = wbOut.active
wsStorybook.title = StorybookSheetTitle
wsSong = wbOut.create_sheet(SongSheetTitle)
logging.info("wsStorybook=%s, wsSong=%s", wsStorybook, wsSong)

# common style
alignmentCenter = Alignment(horizontal='center', vertical='center')
fontYahei12 = Font(name=u'微软雅黑', bold=True, size=12)
thinSide = Side(style='thin', color=colors.BLACK)
allBlackThinBorder = Border(left=thinSide, top=thinSide, right=thinSide, bottom=thinSide)

# several type of headers style
NamedStyleCommonHeader      = "CommonHeader"
NamedStyleStorybookHeader   = "StorybookHeader"
NamedStyleSongHeader        = "SongHeader"
NamedStyleFileHeader        = "FileHeader"

commonBkgColorHex = "AACF91"
commonFill = PatternFill(start_color=commonBkgColorHex, end_color=commonBkgColorHex, fill_type="solid")

...

commonStyleHeader = NamedStyle(name=NamedStyleCommonHeader)
commonStyleHeader.font = fontYahei12
commonStyleHeader.border = allBlackThinBorder
commonStyleHeader.alignment = alignmentCenter
commonStyleHeader.fill = commonFill
wbOut.add_named_style(commonStyleHeader)

...

# init headers
def initOutputExcelHeaders(ws):
    logging.info("ws=%s", ws)

    nameCell = ws["A1"]
    nameCell.value = "名称"
    ws.merge_cells('A1:A2')

    contentAbstractCell = ws["B1"]
    contentAbstractCell.value = "内容简介"
    ws.merge_cells('B1:B2')

    resTypeCell = ws["C1"]
    resTypeCell.value = "资源类型"
    ws.merge_cells('C1:C2')

    isSeriesCell = ws["D1"]
    isSeriesCell.value = "是否是系列"
    ws.merge_cells('D1:D2')

    seriesCell = ws["E1"]
    seriesCell.value = "系列"
    ws.merge_cells('E1:F1')

    seriesNumCell = ws["E2"]
    seriesNumCell.value = "序号"

    seriesNameCell = ws["F2"]
    seriesNameCell.value = "名称"

    for eachCommonRow in ws.iter_rows("A1:L2"):
        logging.info("eachCommonRow=%s", eachCommonRow)
        for eachCellInRow in eachCommonRow:
            logging.info("eachCellInRow=%s", eachCellInRow)
            eachCellInRow.style = NamedStyleCommonHeader

initOutputExcelHeaders(wsStorybook)
initOutputExcelHeaders(wsSong)
wbOut.save(OutputUnifiedFormatExcelFilename)
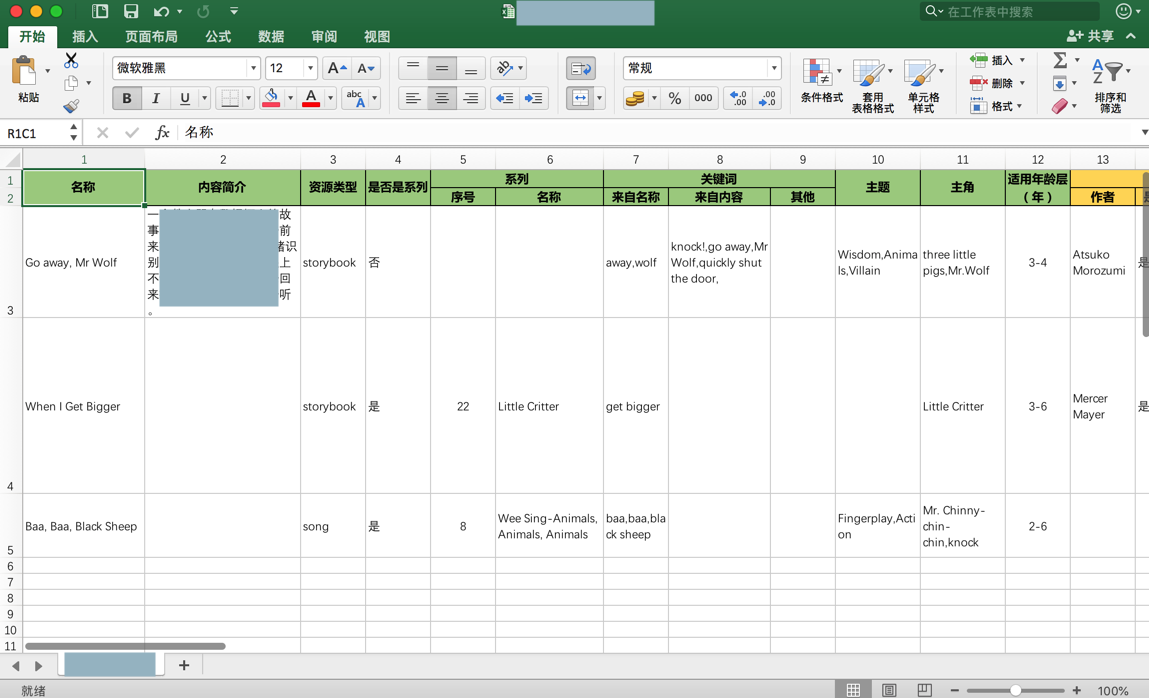
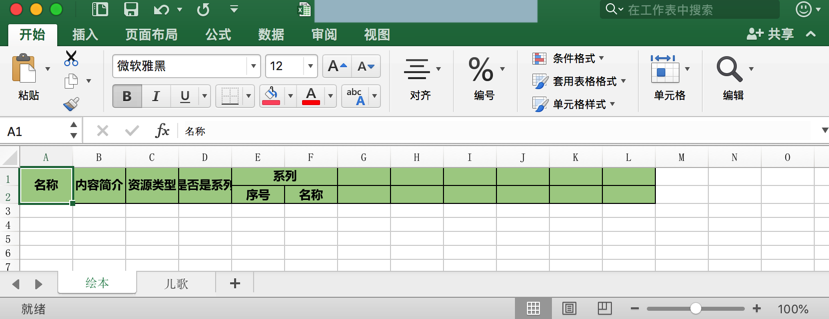
效果:
确保指定的字体系统中是存在的
设置的Font确保是系统中存在的字体才可以
此处用的是Python2,系统中当前的字体名是微软雅黑
对应设置字体为雅黑的代码是
fontYahei12 = Font(name=u'微软雅黑', bold=True, size=12)
其中重点是:font的name是unicode才可以
估计内容原因是:如果name不是unicode,则name找不到,所以会报错,会导致excel打不开
此处微软雅黑字体的效果是: